Imagine giving your stakeholders the ability to interact with their data in real time—asking critical questions and receiving instant, meaningful insights. With the power of Large Language Models (LLMs), this is no longer just a vision but a reality.
LLMs can analyze vast amounts of data, including Electronic Health Records (EHR), PDFs, and documents, helping streamline diagnoses and summarize complex information with ease. These AI models continuously evolve, and with the ability to train them on your own data, you gain both privacy and accuracy. Your sensitive information remains secure while the LLM provides rapid, precise summaries tailored to your specific needs.
- Benefits of Integrating Your Local LLM with Mulesoft
- 🚀 Installing Ollama on Windows & Linux
Benefits of Integrating Your Local LLM with Mulesoft
- You can create enterprise agents that serve specific use cases.
- Interact with your local data by harnessing the power of LLMs.
- Comply with regulations like GDPR, HIPAA, etc.
- The opportunities are endless and can be scaled at the enterprise level.
By deploying local LLMs, hospitals and clinics can harness AI within a secure, on-premises environment, ensuring compliance with HIPAA and other privacy regulations like GDPR. Unlike cloud-based solutions, local LLMs eliminate external exposure while still delivering powerful insights—making them the ideal AI companion for healthcare professionals.
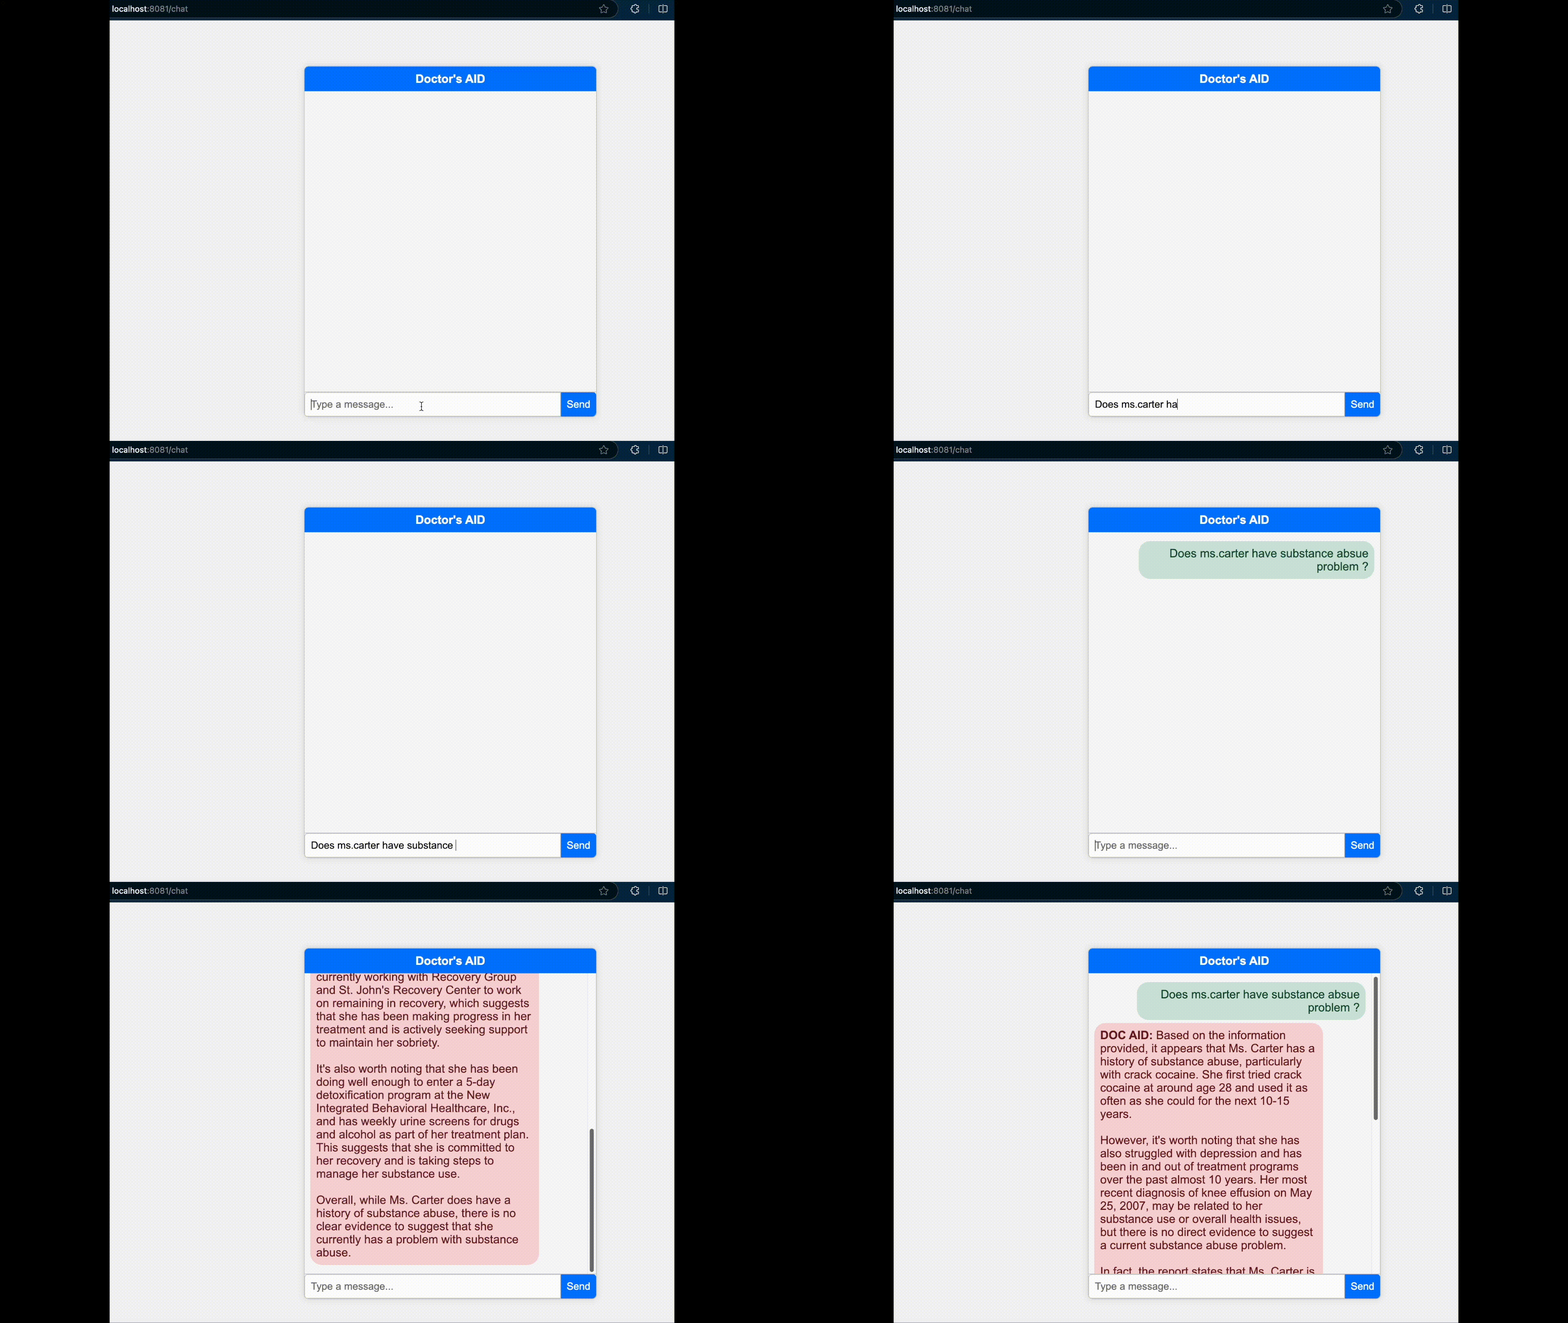
Although local LLMs can be used in many use cases, today we are going to explore how MuleSoft and the local LLM model Ollama help analyze medical data for doctors and suggest common remedies that can assist doctors in evaluating patient conditions without reviewing the entire medical history.
We can also use custom-trained local language models, but we are using the Ollama 3.2 model as it is widely available and appropriately trained.

Mule-AI chain
MAC Project is an open-source project empowering developers to integrate advanced AI capabilities into the MuleSoft ecosystem.
MuleSoft AI Chain is a cutting-edge framework that integrates artificial intelligence (AI) with enterprise systems, allowing businesses to seamlessly connect AI-powered applications with their data sources. This enables real-time automation, intelligent decision-making, and enhanced operational efficiency across various industries, including healthcare, finance, and retail.
We will be looking at a sample use case where we made a RAG agent for understanding a patient health report(Medical EHR) and provide analysis when asked.
Ollama: A Local AI Model Runner for LLMs
Ollama is a powerful tool that allows you to run Large Language Models (LLMs) locally on your machine. It provides a seamless way to download, manage, and interact with AI models like LLaMA, Mistral, and other open-source models, without relying on cloud-based services. This ensures privacy, security, and faster inference since everything runs on your local hardware.
🚀 Installing Ollama on Windows & Linux
🔹 Installation on Windows
Step 1: Download Ollama Installer
- Go to the official website: https://ollama.com
- Download the Windows installer (
.exefile).
Step 2: Run the Installer
- Double-click the downloaded
.exefile and follow the on-screen instructions. - Ollama will set up the necessary environment for running AI models locally.
Step 3: Verify Installation
- Open Command Prompt (CMD) and type:
ollama --version
Step 4: Run Your AI Model
- Pull and run a model using:
ollama run llama3.2🔹 Installation on Linux
Step 1: Open Terminal & Install Ollama
curl -fsSL https://ollama.com/install.sh | bash
Step 2: Verify Installation
ollama --version- If the version number appears, the installation is successful. 🎉
Step 3: Pull & Run the Model
To download and run an AI model, use:
ollama run llama3.2This downloads LLaMA 3.2 and lets you interact with it.
Once you have the local language model set up and running, we will shift our focus to Anypoint Studio and creating a new project. You can also do this in Visual Studio with Mule plugins, but I prefer Anypoint Studio over Visual Studio at this point in time.
🔹 Step-by-Step Guide to Creating a New Project
Step 1: Open Anypoint Studio
- Launch Anypoint Studio on your system.
- Ensure that you have installed the latest version to access the latest features and connectors.
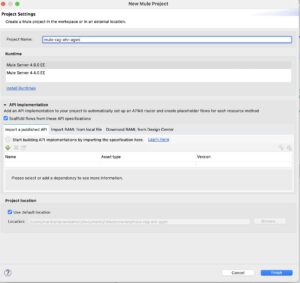
Step 2: Create a New Mule Project
- Click on File → New → Mule Project
(Pro tip: you can use the shortcut: Ctrl + N and select “Mule Project”).
Step 3: Configure Project Settings
- Project Name: Enter a suitable name for your project (e.g.,
MyMuleApp). - Runtime Version: Choose the Mule runtime engine version.
(Select the latest stable version unless specified by your project requirements). - Import from Template/Example: (Optional) You can select a template if you want to use a pre-built example.
- Click Finish to create the project.
Step 4: Install MuleSoft AI Chain Connector
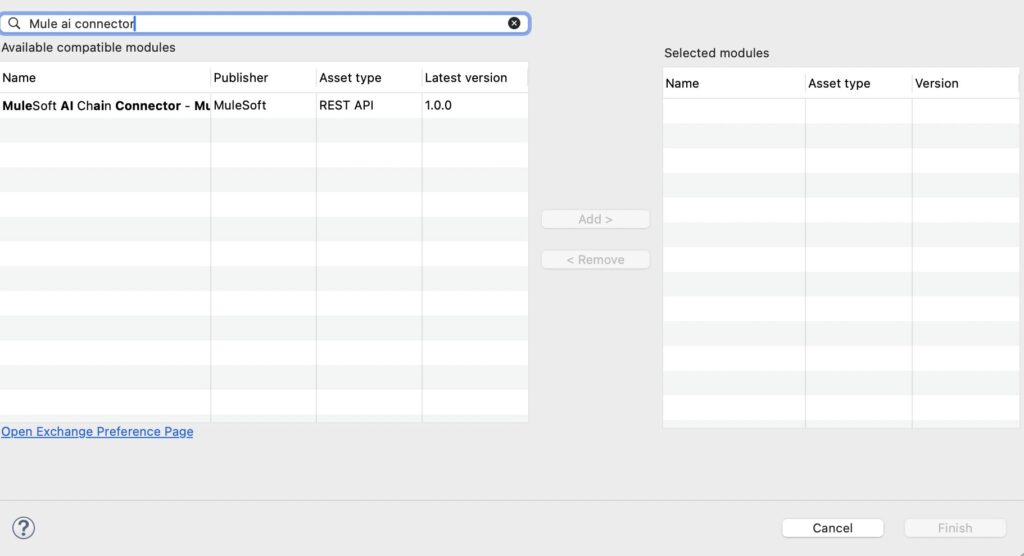
We need to install Mulesoft AI Chain connector, you can do this using By going to Search in exchange of the Mule palette
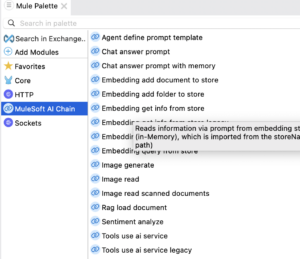
Once you have downloaded the connector from exchange you should see the connector in your mule palette and all the operations that it supports.
For this example we are going to use three operations.
- Embedding new store
- Embedding add document to store
- Embedding get info from store
Embedding new store : The Embedding new store operation creates a new in-memory embedding and exports it to a physical file. The in-memory embedding in MuleSoft AI Chain persists its data through file exports upon any changes.
Embedding Add Document to Store : The Embedding add document to store operation adds a document into an embedding store and exports it to a file. The document is ingested into the embedding using in-memory embedding. The in-memory embedding in MuleSoft AI Chain persists its data through file exports upon any changes.
Embedding get info from store : The Embedding get info from store operation retrieves information from an in-memory embedding store based on a plain text prompt. This operation utilizes a large language model (LLM) to enhance the response by interpreting the retrieved information and generating a more comprehensive or contextually enriched answer. The embedding store is loaded into memory prior to retrieval, and the LLM processes the results to refine the final response.
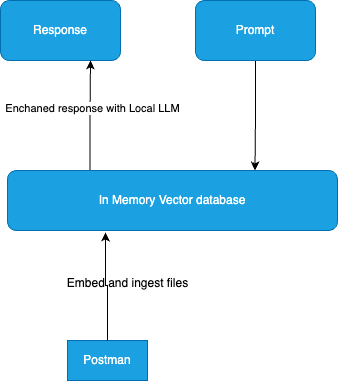
Here, we are creating a local in-memory vector store so that we can analyze the document, and the local LLM can analyze the content and provide results based on the document.
Everything happens in memory so no data leaves from your local machine
You can get detailed instructions on how to download or find the connector here : https://mac-project.ai/docs/mulechain-ai/getting-started
Below you can see all the flows that i used in the app.
Configure Mule AI chain connector, create a configuration file with name: llm-config.json in src/main/resources
{
    "OLLAMA": {
        "OLLAMA_BASE_URL": "http://localhost:11434"
    }
}
You can find the source code here and run the app: https://github.com/nmk32/mule-rag-ehr-agent
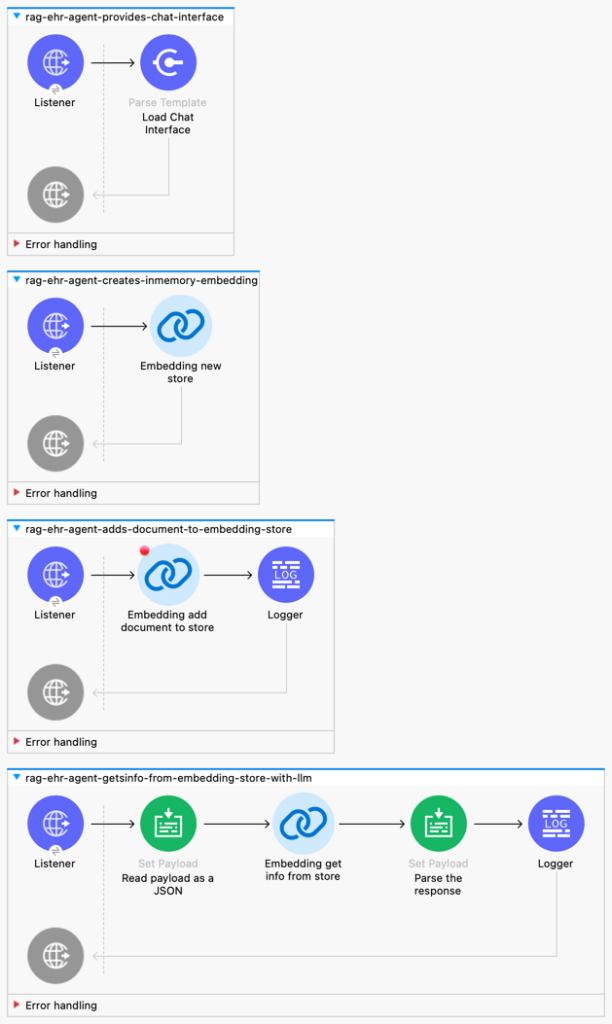
I have designed a chat interface where you can talk with LLM with the information we have from the embeddings.
We have 4 listeners, one which provides chat interface, one that creates a in memory embedding store, We have one listener that updates the embedding store with the file we provide, there is a listener which retrieves the information from embedding store with the help of LLM.
Step 5: Run the Mule Application
Click Run → Run As → Mule Application.
Open postman and import
curl --location 'http://localhost:8081/createEmbeddingStore'Call this endpoint to create a embedding
Import and the endpoint to update the embedding store with the file.
curl --location 'http://localhost:8081/embedfile' \
--header 'Content-Type: application/json' \
--data '{
    "file" : "/Users/manikantanandamuri/Downloads/carter.pdf"
}'
Open your browser and go to http://locahost:8081/chat.
Instead of Local LLM you can use any AI Model like Open AI, Claude etc and You can use vector databses like pg vector,chroma etc.
If you need more detailed consultation please contact me using contact us page
